Year 6 Hockey Lesson 1
Lesson Summary
Learning Intentions
- Play the role of both the defender and the attacker
- Shoot from close range
- Score points against the opposition
Success Criteria
- I can defend and attack in a game
- I can attempt to shoot from close range and sometimes score
- I can score as part of a team in a game
We are Learning...
to shoot under pressure from close range.
Curriculum Links
NC Work collaboratively as a team to score in a variety of game situations.
L Communicate as a team the best way to move forward and score goals
N Can keep score and compare to other teams
Equipment
- Hockey sticks
- Hockey Balls
- Cones
- Bibs
Key Questions
- How was shooting from close range different in the drill compared to the game, and why?
- How did defending three goals change where you positioned yourself and made decisions as the attacker…and defender?
- What helped your team create space and choose the best goal when attacking?
Getting close to the goal
Shooting at close range
In hockey, getting close to the goal to shoot improves accuracy and scoring chances. Close-range shots are harder for goalkeepers to save due to reduced reaction time, allowing for more powerful and controlled shots. Additionally, it exploits defensive weaknesses and increases opportunities for rebounds and deflections.
Teaching Points
✔︎ Shooting at close range
- Players should keep the ball close to their feet to avoid tackles from defenders
- Set the stick early so you can shoot quickly under pressure.
- Keep your head up to watch for defenders
- When close to the goal, select either slap or push to shoot
Lesson Content
Starter Activity - Roller ball
Objective: The aim of the game is to score by passing the ball over the opposition’s back line. Focus on shooting, aiming, passing and making decisions under pressure.
Set up: Divide the class into teams of 5 and play 5 v 5 games. Use the same pitch that you will use for the main game later.
Rules:
- Teams must stay in their own half at all times.
- Players may dribble or pass the ball within their half.
- A player may only control the ball for up to 10 seconds before passing or shooting.
- Teams can only shoot from their own half.
- Players must use hockey sticks only — no feet or hands.
Extensions
- Two-ball game: Add a second ball to add challenge.
- Bonus points: Place cones behind the back line; hitting a cone earns an extra point.
Easier: Make the pitch wider and shallower to create more space and scoring opportunities. Remove the 10-second rule.
Harder: Pupils must hit a target (cone or gate) behind the line to score. Reduce space or lower the time limit on possession.
Discussion: How did moving into space help create chances to score? What decisions did you have to make when choosing to pass, dribble or shoot? What did you look for when attempting a shot?
Assessment for Learning
Objective: The aim of the game is to beat the opposition by scoring more goals. Encourage children to get close to the goal before shooting.
Discussion: What made scoring difficult in the starter activity? (Guide pupils to recognise that they were far from the goal and had defenders in front of them blocking the ball).
Set up: Play the game 4 V 4. On a pitch, approximately 10m by 20m, divided into three areas with a no-tackling zone in the centre of the pitch – as per the diagram. Position three goals on each backline.
Rules
- No tackling in the centre zone.
- Sticks only – no feet (free pass to the opposition).
- Sideline restart if the ball goes out (non-offending team passes in).
- Play restarts from the centre after a goal (conceding team starts).
- Hitting with back of stick results in a free pass to the opposition
Scoring: Middle goal = 5 points. Outer goals = 1 point.
Easier: Use larger goals or score by passing to a teammate over the backline. Restrict which zones some players can enter.
Harder: Limit the number of players allowed to score. Play with uneven sides, e.g. 5 V 3.
Discussion: What helped you get closer to the goal before shooting? How did the centre no-tackling zone change the way you passed or moved? Which goal was the best option to aim for, and why? How did defenders try to stop shots without tackling? Did you score more goals if you were nearer to the goal or further away? Why is it harder to score from further away?
Skill Development
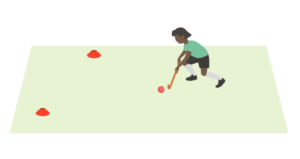
Shooting from close range – It is important to be able to shoot effectively from close range, especially when under pressure from defenders. Attackers often have very little space to manoeuvre when shooting at close range.
Set-up:
- Keep pupils working on the same pitch used in the game.
- Each team works in their own half, facing the centre goal.
- Place three cones in each half to create a short dribbling route towards the goal.
- Use the centre goal only; no additional areas are needed.
How to play:
- Player 1 dribbles the ball around the cones and takes a close-range shot at the centre goal.
- After shooting, they collect the ball and return to the back of the line.
- Player 2 then begins, continuing until all players have had a turn.
- Keep the activity unopposed to allow pupils to focus on technique and experience success.
Extension: Change the cone layout so that pupils approach the goal from different angles.
Teaching focus: Controlled dribbling. Quick set-up before shooting. Accuracy from close range. Encourage pupils to observe and give simple feedback to their teammates on shooting technique.
After some time on this activity, return to the assessment for the learning task.
Look for: Close control on the ball. Staying close to the cones. Head up looking where they are going and at the goal. Releasing the ball with power to make it over the line and accuracy go between the cones. Effort and enthusiasm, even when mistakes are made. Determination to follow up when they lose ball control or miss.